Monday, January 25, 2016
Some First Impressions | Burt's Bees Facial Wipes and Milani Everyday Eyes Eyeshadow Palette
It's been far too long.
A lot has happened in my life, and I'm sure in yours as well, since we hung out last, but I'd like to politely reintroduce myself.
Hi, I'm Katie. And welcome to Curly Girlie. If you aren't sure what this is or who I am, take a look at some of my earlier posts, and feel free to comment questions on any of my posts or videos. I'd love to get to know you better.
I picked up a few new items at Walgreens, and I wanted to share two with you. Zach, my husband, got me a camera for Christmas, and I am so excited to finally be filming in higher quality. This still isn't Century 21 Studios, and it never will be, but I'm just happy to be in a place in life that allows me to invest time and money in this beauty blogging thing.
I wasn't able to include as much information as I wanted to about the products in the video; I didn't want to chat on and on, and YouTube only gives me so much time per video. So here are some extended first impressions...
Burt's Bees Facial Cleansing Towelettes
These were very easy and pleasant to use. They have a clean, herbal scent and didn't make my face feel wet, irritated, or sticky, as other cleansing wipes have. They didn't bother my eyes at all, and since the video, I've used them to actually take off makeup. I still would recommend a more complete skincare routine than simply using a cleansing wipe, but in a pinch or at the end of a really long day or for a mid-day cleanse, these work really well. I felt like they removed pretty much all of my makeup. There was only a little bit of stubborn mascara and eyelash glue left behind.
The price was great, too. You can find these at Wal-Mart, Target and drugstores. Probably anywhere else that stocks Burt's Bees, too. They are anywhere between 5 and 6 dollars depending where you go, and go get 30 wipes in a pack. I think that's a pretty good deal; it's only about 5 and a half dollars a month.
Milani Everyday Eyes Eyeshadow Collection in "Must Have Naturals"
I'm always down to try a new Milani Product. When I saw these larger eyeshadow palettes, which have become quite the trend at the drugstore, I knew I wanted to give them a shot. I'm really happy I did, and I will definitely be picking up some of their other color collections to try out.
I chose "Must Have Naturals" for the simple, gorgeous shades. When I am shopping with the intention of trying new things and I have to make a decision about which colors to take home, I always go for the cool tones. I am also a sucker for a matte black eyeshadow, and I feel like you can tell a lot about the quality of a brand or a brand's collection by whether or not they can do a good matte black shade.
Let me just say, I have trouble NOT using this palette since I bought it. I love every color in it and I think they each pull their own weight. As I alluded to in the video, none of these shades are going to blow your mind in how interesting or unique they are. But they are all soft, creamy, and pigmented shadows. Both the mattes and the satins/shimmers are working for me, and that is not something you see in drugstore eyeshadows all the time, especially in these larger palettes.
The only shade that was weird at first was the lightest matte shade. I tried to use it on my browbone, and it was just plain orange on me. Not pretty. Not pretty at all. But I am very pale, and the color comes out of the pan darker than it looks, so that's not the eyeshadow's fault. It's just me trying to make it into something it's not. I couldn't include the footage of the whole situation because it just would've made the video too long, but once I started over and used the color more appropriately, I was nothing but pleased.
While I'm not ready to do a full review and give my final verdict, I can say that I am really enjoying this little palette and I think if you give it a go you will, too.
Do you like this kind of video? Are you ready to see some actual tutorials with this palette or other makeup? Let me know in the comments down below, and check back soon.
xoxo, kt.

Friday, December 5, 2014
Get that Vampy Lip Look: Burgundy Lip Trend Tutorial.
Guys. It's my first tutorial. I'm super stoked.
I worked really hard to cut down all the video I had to just under 15 minutes for you. As you're watching, you will notice that I sped up some parts. Sometimes during those parts, it looks like I am talking. I am in fact talking, but I'm not saying anything overly important, so don't feel as if you are missing anything crucial.
This may not be the look for everyone, but I love a bold lip. And the eyes are so simple that anyone might want to watch at least the first 10 minutes. I'll list all the products I used below the video.
Eyes.
Wet 'n' Wild's "Take on the Day" Eyeshadow Primer from the Fergie Collection
NYX's Love in Paris Palette in "Je Ne Sais Quoi"
You just need a light, shimmery taupe, a warm medium brown, and a cool, really dark charcoal.
NYX's Love in Paris Palette in "Mon Cherie"
You need a dark, cool brown. Mine had some sparkle, but that isn't necessary. And a shimmery vanilla. Or a not shimmery vanilla. You decide.
L'Oreal's Voluminous Butterfly Mascara in "Blackest Black"
Brows.
A mixture of shadows from e.l.f.'s 96-Piece Geometric Palette
Lips.
NYX's Slim Lip Pencil in "Currant"
Revlon's Super Lustrous Lipstick in "Black Cherry"
Face.
Revlon's Colorstay Foundation for Normal/Dry Skin in "Ivory"
Hard Candy's Lite Brite Undereye Concealer and Highlighter in "Fair"
Revlon's Photoready Eye Primer + Brightener in 003
A mixture of eyeshadows from e.l.f.'s 80-Piece Day-to-Night Palette for my Contour
e.l.f.'s Studio Blush in "Mellow Mauve"
e.l.f.'s Studio Translucent Mattifying Powder
This is exciting. Thanks for stopping by.
I worked really hard to cut down all the video I had to just under 15 minutes for you. As you're watching, you will notice that I sped up some parts. Sometimes during those parts, it looks like I am talking. I am in fact talking, but I'm not saying anything overly important, so don't feel as if you are missing anything crucial.
This may not be the look for everyone, but I love a bold lip. And the eyes are so simple that anyone might want to watch at least the first 10 minutes. I'll list all the products I used below the video.
Eyes.
Wet 'n' Wild's "Take on the Day" Eyeshadow Primer from the Fergie Collection
NYX's Love in Paris Palette in "Je Ne Sais Quoi"
You just need a light, shimmery taupe, a warm medium brown, and a cool, really dark charcoal.
NYX's Love in Paris Palette in "Mon Cherie"
You need a dark, cool brown. Mine had some sparkle, but that isn't necessary. And a shimmery vanilla. Or a not shimmery vanilla. You decide.
L'Oreal's Voluminous Butterfly Mascara in "Blackest Black"
Brows.
A mixture of shadows from e.l.f.'s 96-Piece Geometric Palette
Lips.
NYX's Slim Lip Pencil in "Currant"
Revlon's Super Lustrous Lipstick in "Black Cherry"
Face.
Revlon's Colorstay Foundation for Normal/Dry Skin in "Ivory"
Hard Candy's Lite Brite Undereye Concealer and Highlighter in "Fair"
Revlon's Photoready Eye Primer + Brightener in 003
A mixture of eyeshadows from e.l.f.'s 80-Piece Day-to-Night Palette for my Contour
e.l.f.'s Studio Blush in "Mellow Mauve"
e.l.f.'s Studio Translucent Mattifying Powder
This is exciting. Thanks for stopping by.
Monday, December 1, 2014
Can You Believe It's Manicure Monday?!?!
It's been far too long. Far, far too long. But not without good reason. I have been really really busy getting engaged. And working through all of everything that comes with being engaged.
I love these picture update moments, so here we go...
Zach and I have been together for close to seven years. This is a picture of us going to his prom when he was a junior in high school and I was a freshman. We grew up going to the same church with our families and started growing as friends earlier that school year. I had had a pretty consistent crush on him since I was...12, maybe? so those early convos on AIM were pretty much dreams come true.

We started dating when I turned 16 and spent the rest of Zach's time in high school together.

Zach graduated and headed to college in Virginia and I finished my last year of high school. We were already planning to be with each other for a while. so we just kind of let long distance happen.

I went to school in New York. Zach visited me my sophomore year and my friend Ashton took some pictures for us. Some people were suspicious and thought they might have been engagement photos, but we weren't planning to get married until we both had graduated, so there was no reason to rush things.


And then Zach did propose to me. For real. I knew we were going to get married, but I had no idea he was going to ask me when he did. Happiest October 4th of my life yet.

 |
| He brought all the letters I have written him and all the cards I have made and laid them out in a path to him. And then he started to read me something from a letter I wrote him as he was leaving for college. I couldn't handle myself for a moment. |

 |
| Being proposed to was genuinely one of the most joyful and exhilarating experiences of my life. If getting married is important to you, I sincerely hope you get to experience a proposal (from either side :)). And another huge thank you to all our friends who helped with the planning and executing...of the plan. In case you aren't tired of pictures yet, I'll just share a few more from our inevitable engagement session. Once again, with the fantabulous Ashton. |
 |
| I feel like this one just screams "Christmas Card." Am I right? |

Oh, and Zach has a puppy. So I also have a puppy.

For anyone who plans on getting some pictures taken for any reason but isn't sure about finding a photographer or being able to afford one, I'd like to just take some time to share what I worked out for these photos. I found a friend who likes to take photos. My fiance happens to have a nice camera, but even if he didn't we still would have gotten some perfectly fine shots with a basic digital. Then I used PicMonkey, which is a free online photo editing website. I just tweaked the pictures til I liked the way they looked, and they save in really high quality. Money saved. Check it out here.
Now for the manicure. Can I just say that I am also fantastically excited about the nail polish I am about to show you? It is most definitely a new favorite color, and I was more than impressed with the virtual lack of chipping.
Meet Revlon's "Fearless."
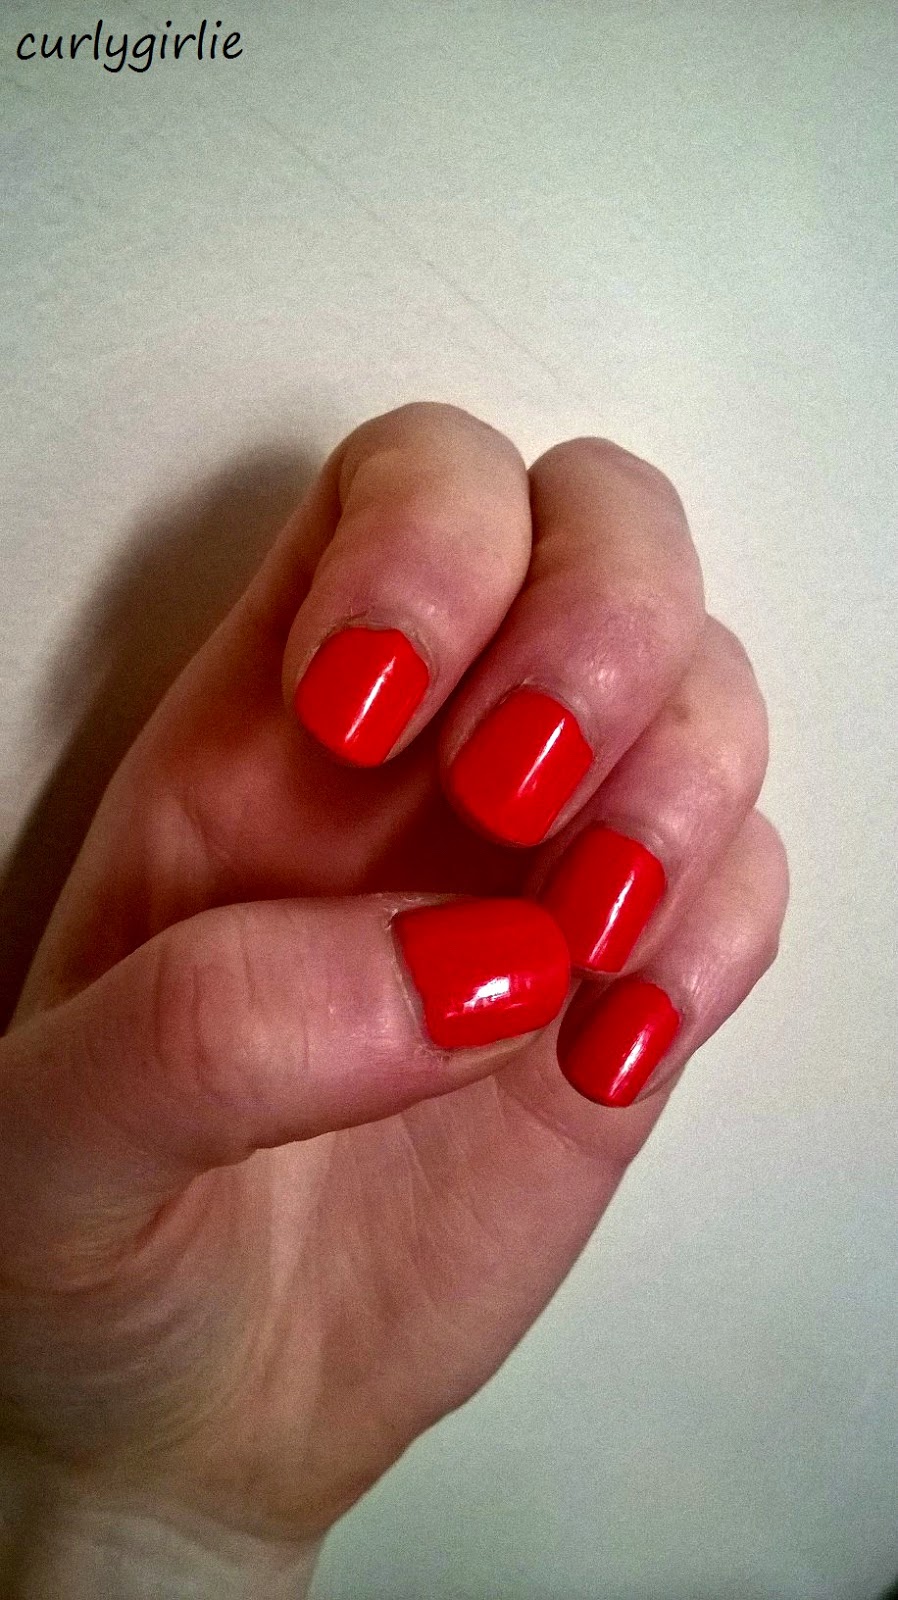
The lighting never seemed to be ideal, so I don't necessarily have a fantastic picture of this polish in action. Here is a shot in natural, but very cloudy, light.
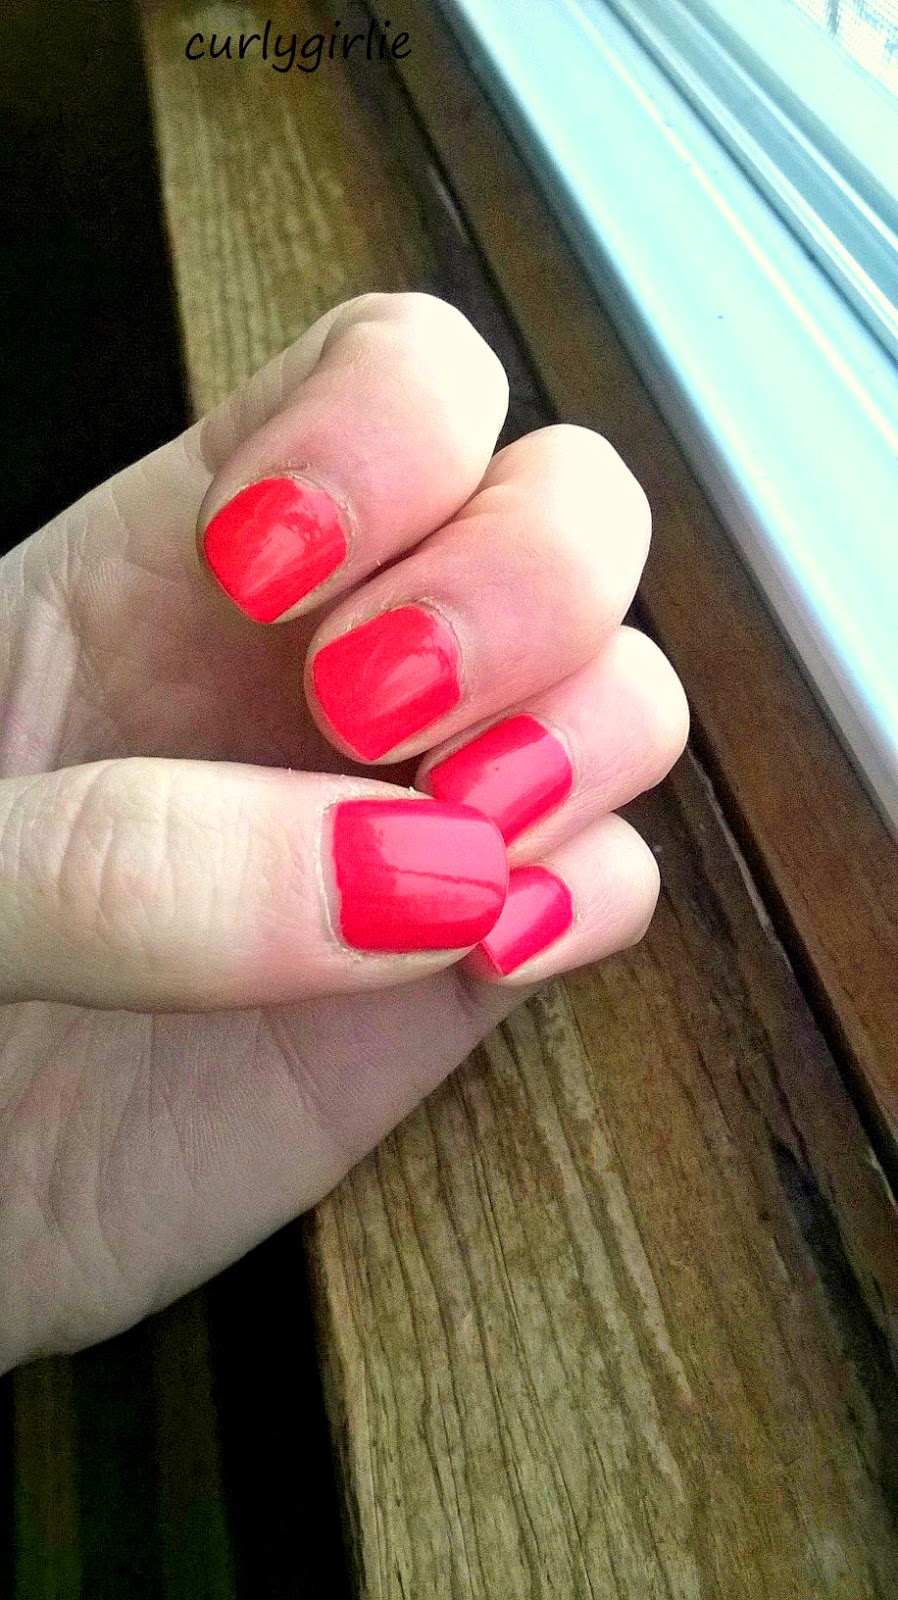
This is really not a normal color for me. I tend to stay away from reds in general; I just don't usually love how either average or bold or bloodthirsty they look. But this caught my eye the last time I was in Wal-Mart and I took a little risk on it. Turns out it is going to be one of my all time favorites. It applied nicely; two coats and I had the opacity I wanted. It's a really bright, clean, orangey red. Not necessarily the first color I think of for the winter months, but I l-o-v-e-d the way it looked with some of my cheetah print accents and gold jewelry, and it really just gave me a nice pop of brightness in the middle of the snow and rain and grey. If I ever get a picture that does it justice you will be the first to see it.
As usual I used Orly's Bonder Basecoat and Polishield Top Coat. This polish wore for a good week with only some shrinkage from the topcoat. No real chipping to speak of. Awesome.
Thank you oh-so-much for stopping by. I'm going to get caught up with some fall posts and then all the winter-themed thoughts in my head are coming your way.
Subscribe to:
Posts (Atom)